Documentation
Download PDFEverything you need to install, configure, and use Light Wrangler.
Installation
Supported Blender versions: 4.0 to 5.1.
- 1. Download — Acquire the
.zipfile provided with your purchase. Do not extract the archive. - 2. Install — Open Blender and go to
Edit > Preferences > Add-ons > Install. Navigate to and select the downloaded .zip file. - 3. Activate — Find the add-on in the list and check the box next to its name.
- 4. First run — On first activation, a welcome popup points you to the right-click Light Operations menu and the Light Data customization panel. Textures (gobos, HDRIs, IES profiles) are streamed on demand from the server — see Online Catalog & Cache.
Preferences
Access settings at Edit > Preferences > Add-ons, then select "Light Wrangler".
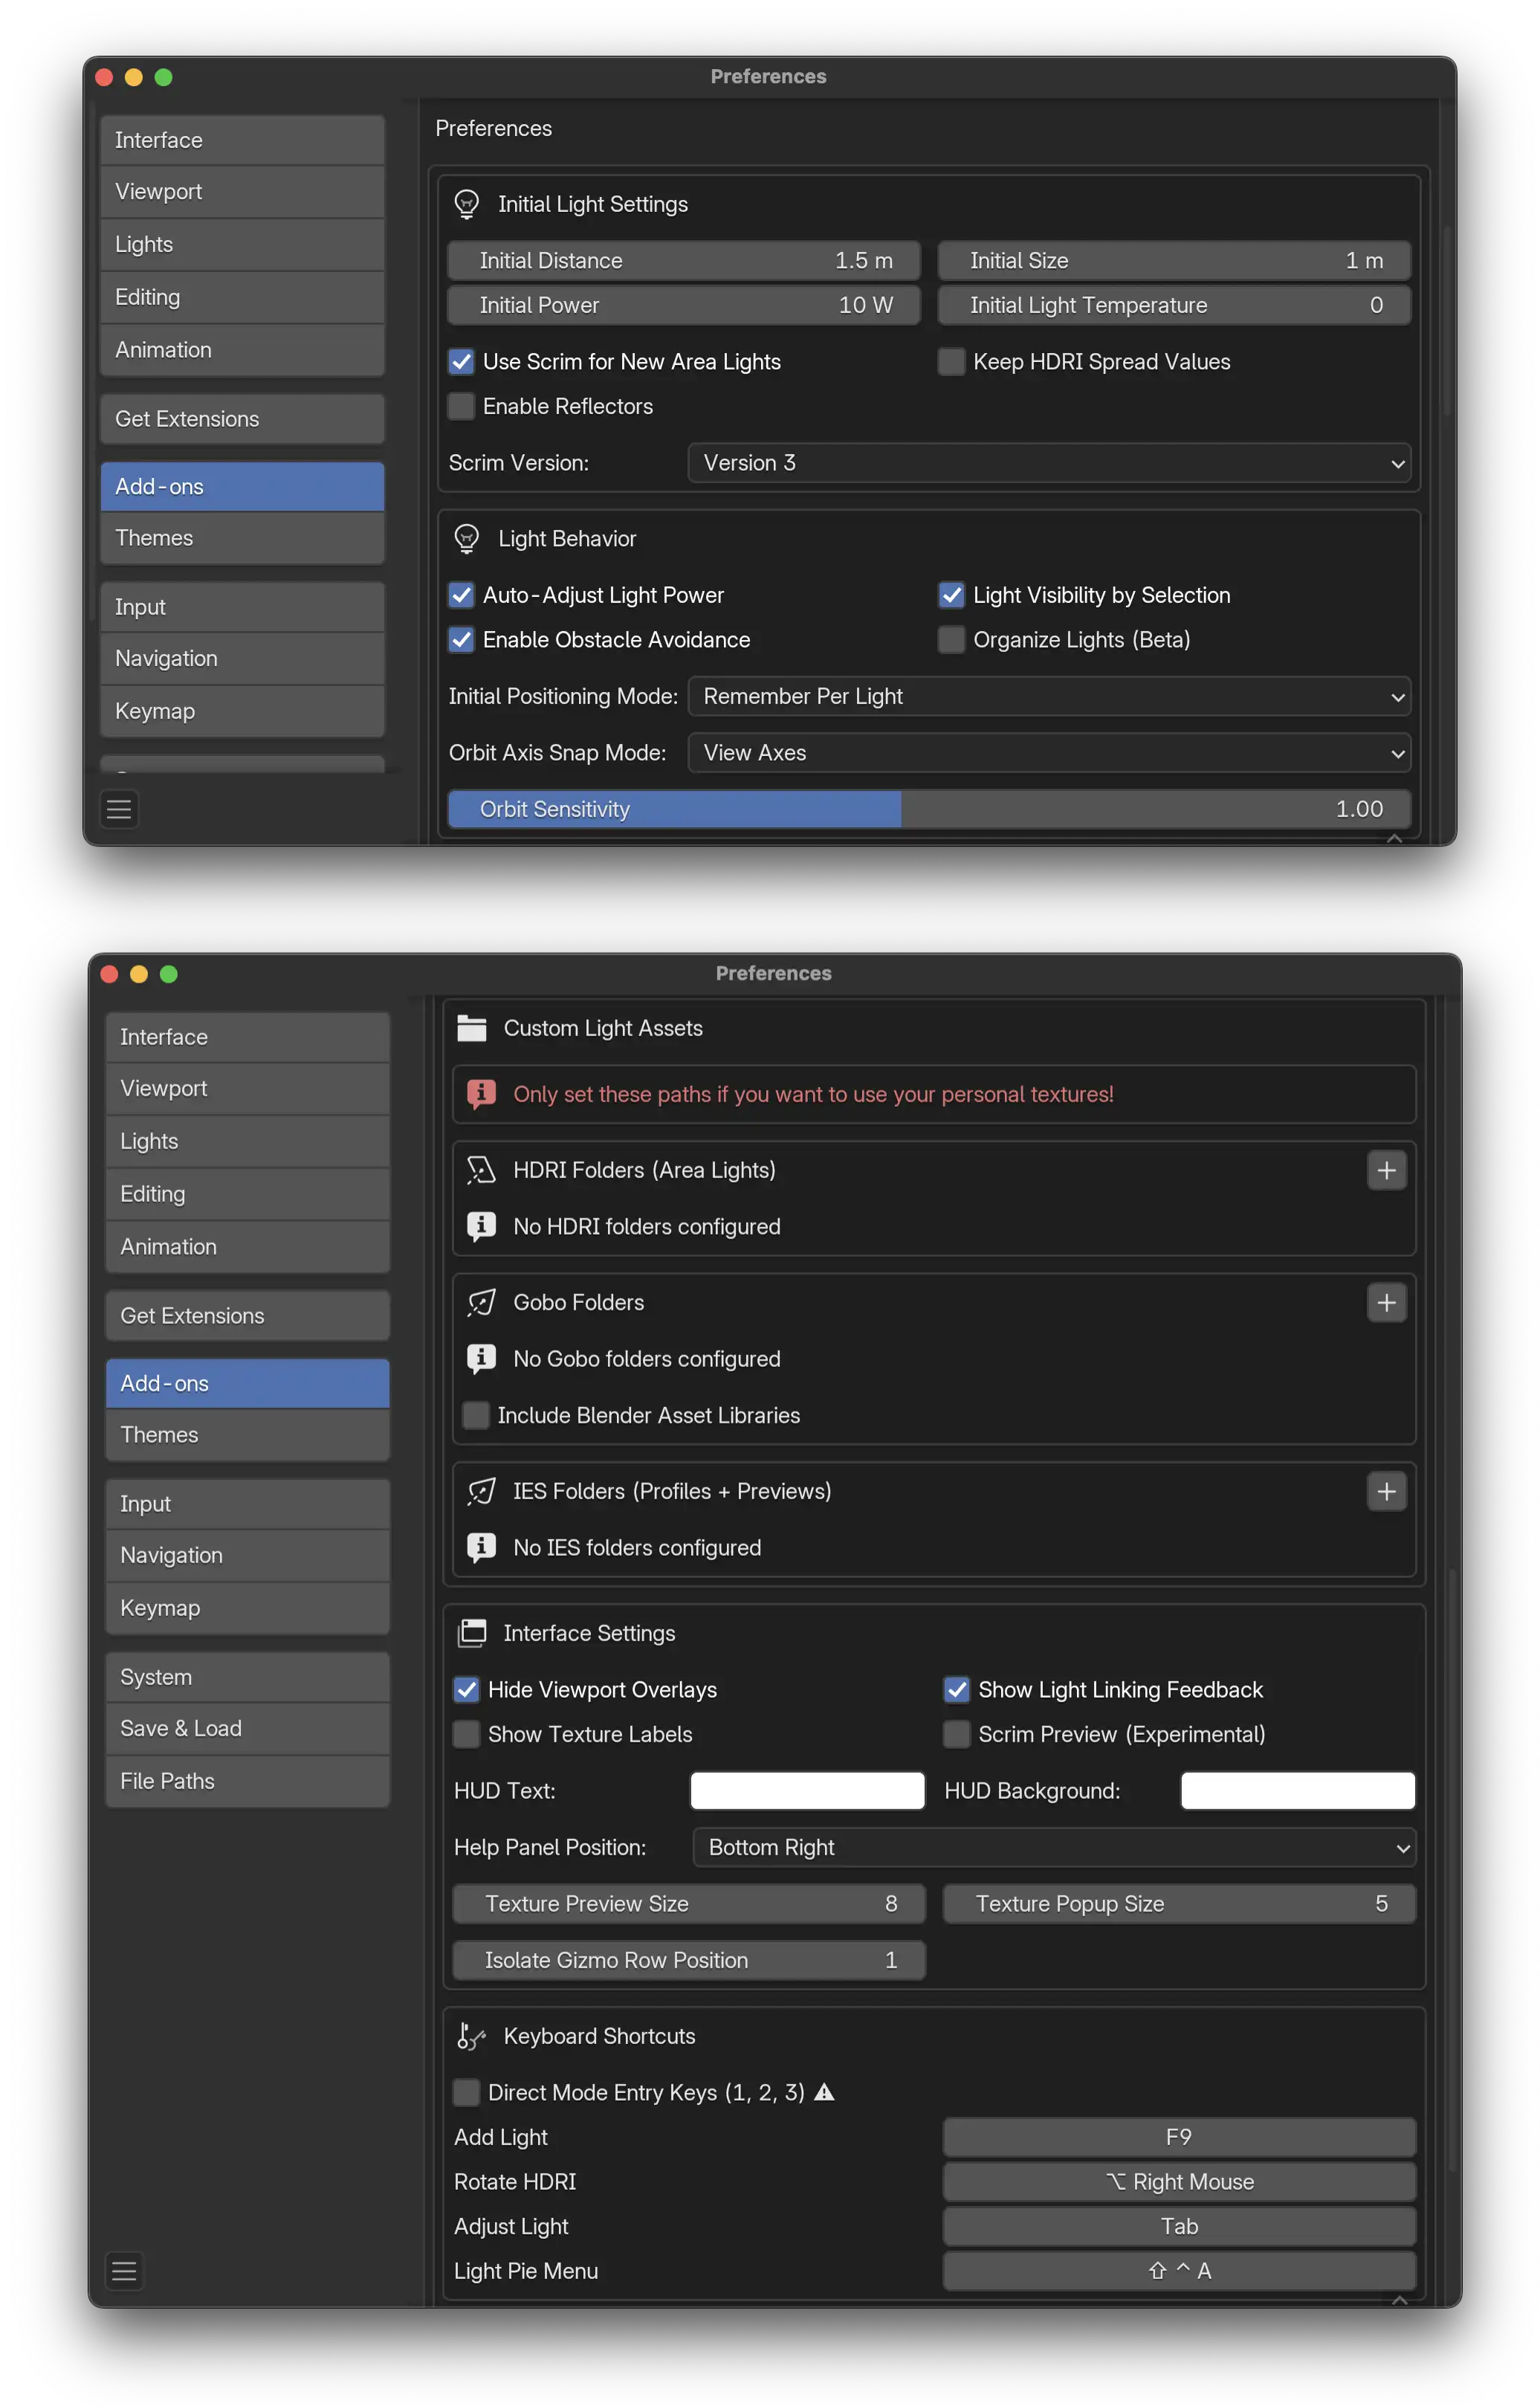
Initial Light Settings
Light Behavior
Custom Light Assets
Configure paths to your personal texture libraries. Only set these if you want to use your own textures.
Addon's Downloaded Textures
Downloaded gobos, HDRIs, and IES profiles are stored automatically in a per-platform cache directory. Override the location only if needed (e.g., to point at a NAS or external drive).
Interface Settings
Keyboard Shortcuts (Preferences)
These shortcuts can be customized in the preferences panel.
Online Catalog & Cache
Light Wrangler streams textures (gobos, HDRIs, IES profiles) from a server on demand instead of bundling them with the addon. This keeps the install lean and lets the library grow over time without addon updates.
Allow Online Access
A single "Allow Online Access" button enables downloads of gobos, HDRIs, and IES previews together. Selecting any texture pulls the asset to your local cache on first use; subsequent uses are instant.
Cache Location
By default, cached textures live in a per-platform user directory. Override with the Cache Directory preference if you want them on a NAS, external drive, or shared location. Changing the path automatically copies existing cache content to the new location.
Auto-Repair on Load
When you open a file with broken Light Wrangler texture paths — for example, after sharing a .blend across machines or moving your cache — Light Wrangler relinks references to your current cache and quietly downloads any missing assets in the background.
Externalized Scrim Textures
Scrim packed images are stored in the cache directory rather than inside the .blend file, keeping scene files small.
Adding & Adjusting Lights
Adding a Light
- Right-click →
Light Operations > Add Light - Press F7
- Pie Menu with Ctrl + Shift + A
Adjust Existing Lights
- Select the light, right-click →
Light Operations > Adjust Light - Press Tab — or Shift + Tab if Tab is already bound by another addon.
Duplicate & Copy/Paste
- Right-click →
Light Operations > Duplicate Light(also works for flags and reflectors) - Right-click →
Copy Light Settings/Paste Light Settingsto transfer settings between lights
Track to Target
Right-click → Light Operations > Track to Target. Choose to create a new empty for tracking or use an existing object. If multiple lights are selected, all will target the chosen point. Flags and reflectors also support tracking.
Flags & Reflectors
- Right-click →
Light Operations > Add Flag— choose Solid (blocker) or Gobo (stencil pattern). - Right-click →
Light Operations > Add Reflector(requires Enable Reflectors in preferences).
Flags and reflectors use the same interactive positioning system as lights — Reflect, Direct, and Orbit modes all work identically.
Real-Time Adjustments
All adjustments work during interactive mode. Mouse Wheel can be replaced with two-finger trackpad scroll. When no geometry is under the cursor, lights, flags, and reflectors place at the cursor position along the view ray instead of failing.
Mouse Drag Mode
When Adjustment Method is set to Mouse Drag in preferences, hold a modifier key and drag the mouse left/right to adjust continuously instead of scrolling in discrete steps. Positioning activates only while you hold 1, 2, or 3 — eliminating accidental position jumps between adjustments.
Positioning Modes
When Direct Mode Entry Keys is enabled in preferences:
Additional Controls
Visibility & Isolation
Light & Shadow Linking
During interactive mode, aim at any object to manage linking:
Light Customization (Cycles)
Located in the Light Data panel. Each light type has dedicated customization modes:
Customization Features
Procedural Scrim. Transform an area light into a light scrim with adjustable Feathering, Horizontal Tilt, Vertical Tilt, Imperfection, and Edge Sharpness controls.
HDRI Textures. Apply textures like Octabox, Parabolic Reflector, Umbrella, Fresnel, LED panel, and more. Includes Contrast, Hue Shift, Saturation, and Playback Speed controls.
Gobos. Dynamic shadow patterns with static and animated versions. Compatible with area lights, spotlights, and EEVEE spotlights.
IES Profiles. Real-world lighting patterns for point lights. Includes Scale, Rotation (X/Y/Z), Exposure, and Color Temperature Presets. Strength is auto-adjusted from the profile's metadata so different fixtures appear at consistent intensities.
IES Library Browser. With an ieslibrary.com API key, browse the online IES collection directly inside the panel — filter by manufacturer or tag, search, mark favorites, and download on selection.
Diffuse/Glossy Balance. Available in all modes — control a light's contribution to diffuse and glossy material components.
Separate Glossy Color. Set a different color for glossy (specular) reflections independent of diffuse color.
Flicker Effect. Available in Default, HDRI, IES, and Scrim modes — add animated flickering to lights.
Interactive Scrim Preview. Real-time preview rendering in the customization panel (experimental, enable in preferences).
Export Scrim as HDR. Export Scrim lights as HDR images at 1K/2K/3K/4K resolution from the Light Data panel.
Custom Textures. Add your own HDRI, Gobo, and IES folders in addon preferences.
False Color Setup
During interactive mode, F toggles False Color and Shift + F cycles between False Color, Zone System, and ARRI False Color. The two additional view transforms require a one-time OCIO installation step.
What They Are
- Zone System — Smooth gradients, 11 zones (~1 stop each).
- ARRI False Color — Industry-standard discrete zones.
Both include the same Look options as Blender's built-in False Color: Punchy, Greyscale, and contrast controls.
Installation
Requires Blender 5.0 or later. The installer is in Edit > Preferences > Add-ons > Light Wrangler > False Color View Transforms.
- 1. Click Prepare False Color to create a patched OCIO config folder.
- 2. Click Open Blender Folder to reveal the target color management folder.
- 3. Replace the contents of the Blender folder with the prepared folder.
- 4. Restart Blender.
HDRI Scene Rendering
Located in the World tab. Renders a 360° equirectangular HDRI image of the current scene with a single click — useful for capturing a finished lighting setup as a reusable environment, or for compositing reference. Emissive mesh objects are supported (including these increases render time).
Texture Recovery
Two recovery paths handle missing or broken texture references:
Automatic (v4 files)
When you open a v4 file with dead gobo, HDRI, or IES paths — for example, after sharing across machines or moving your cache — Light Wrangler automatically relinks references to your current cache and downloads any missing assets in the background. No action required.
Manual (pre-v4 files)
For files created with Light Wrangler 3 or earlier whose bundled texture paths no longer resolve, use the manual recovery tool:
- 1. Open
Edit > Preferences > Add-ons > Light Wrangler > Texture Recovery. - 2. Click Recover Textures.
- 3. Light Wrangler scans the scene for broken v3 paths, downloads originals from the server, and relinks the references. Progress is shown next to the button.
Keyboard Shortcuts
All shortcuts are customizable in addon preferences.