Light Wrangler
Documentation
Complete guide for installation, configuration, and usage of the Light Wrangler add-on for Blender.
Installation
- Download: Acquire the .zip file provided with your purchase. Do not extract the archive.
- Installation: Open Blender, go to
Edit > Preferences > Add-ons > Install, then navigate to and select the downloaded .zip file. - Activation: Find the add-on in the list and check the box next to its name to activate it.
Configuration Settings
Access the settings for Light Wrangler by navigating to Edit > Preferences > Add-ons, then locate and select "Light Wrangler".
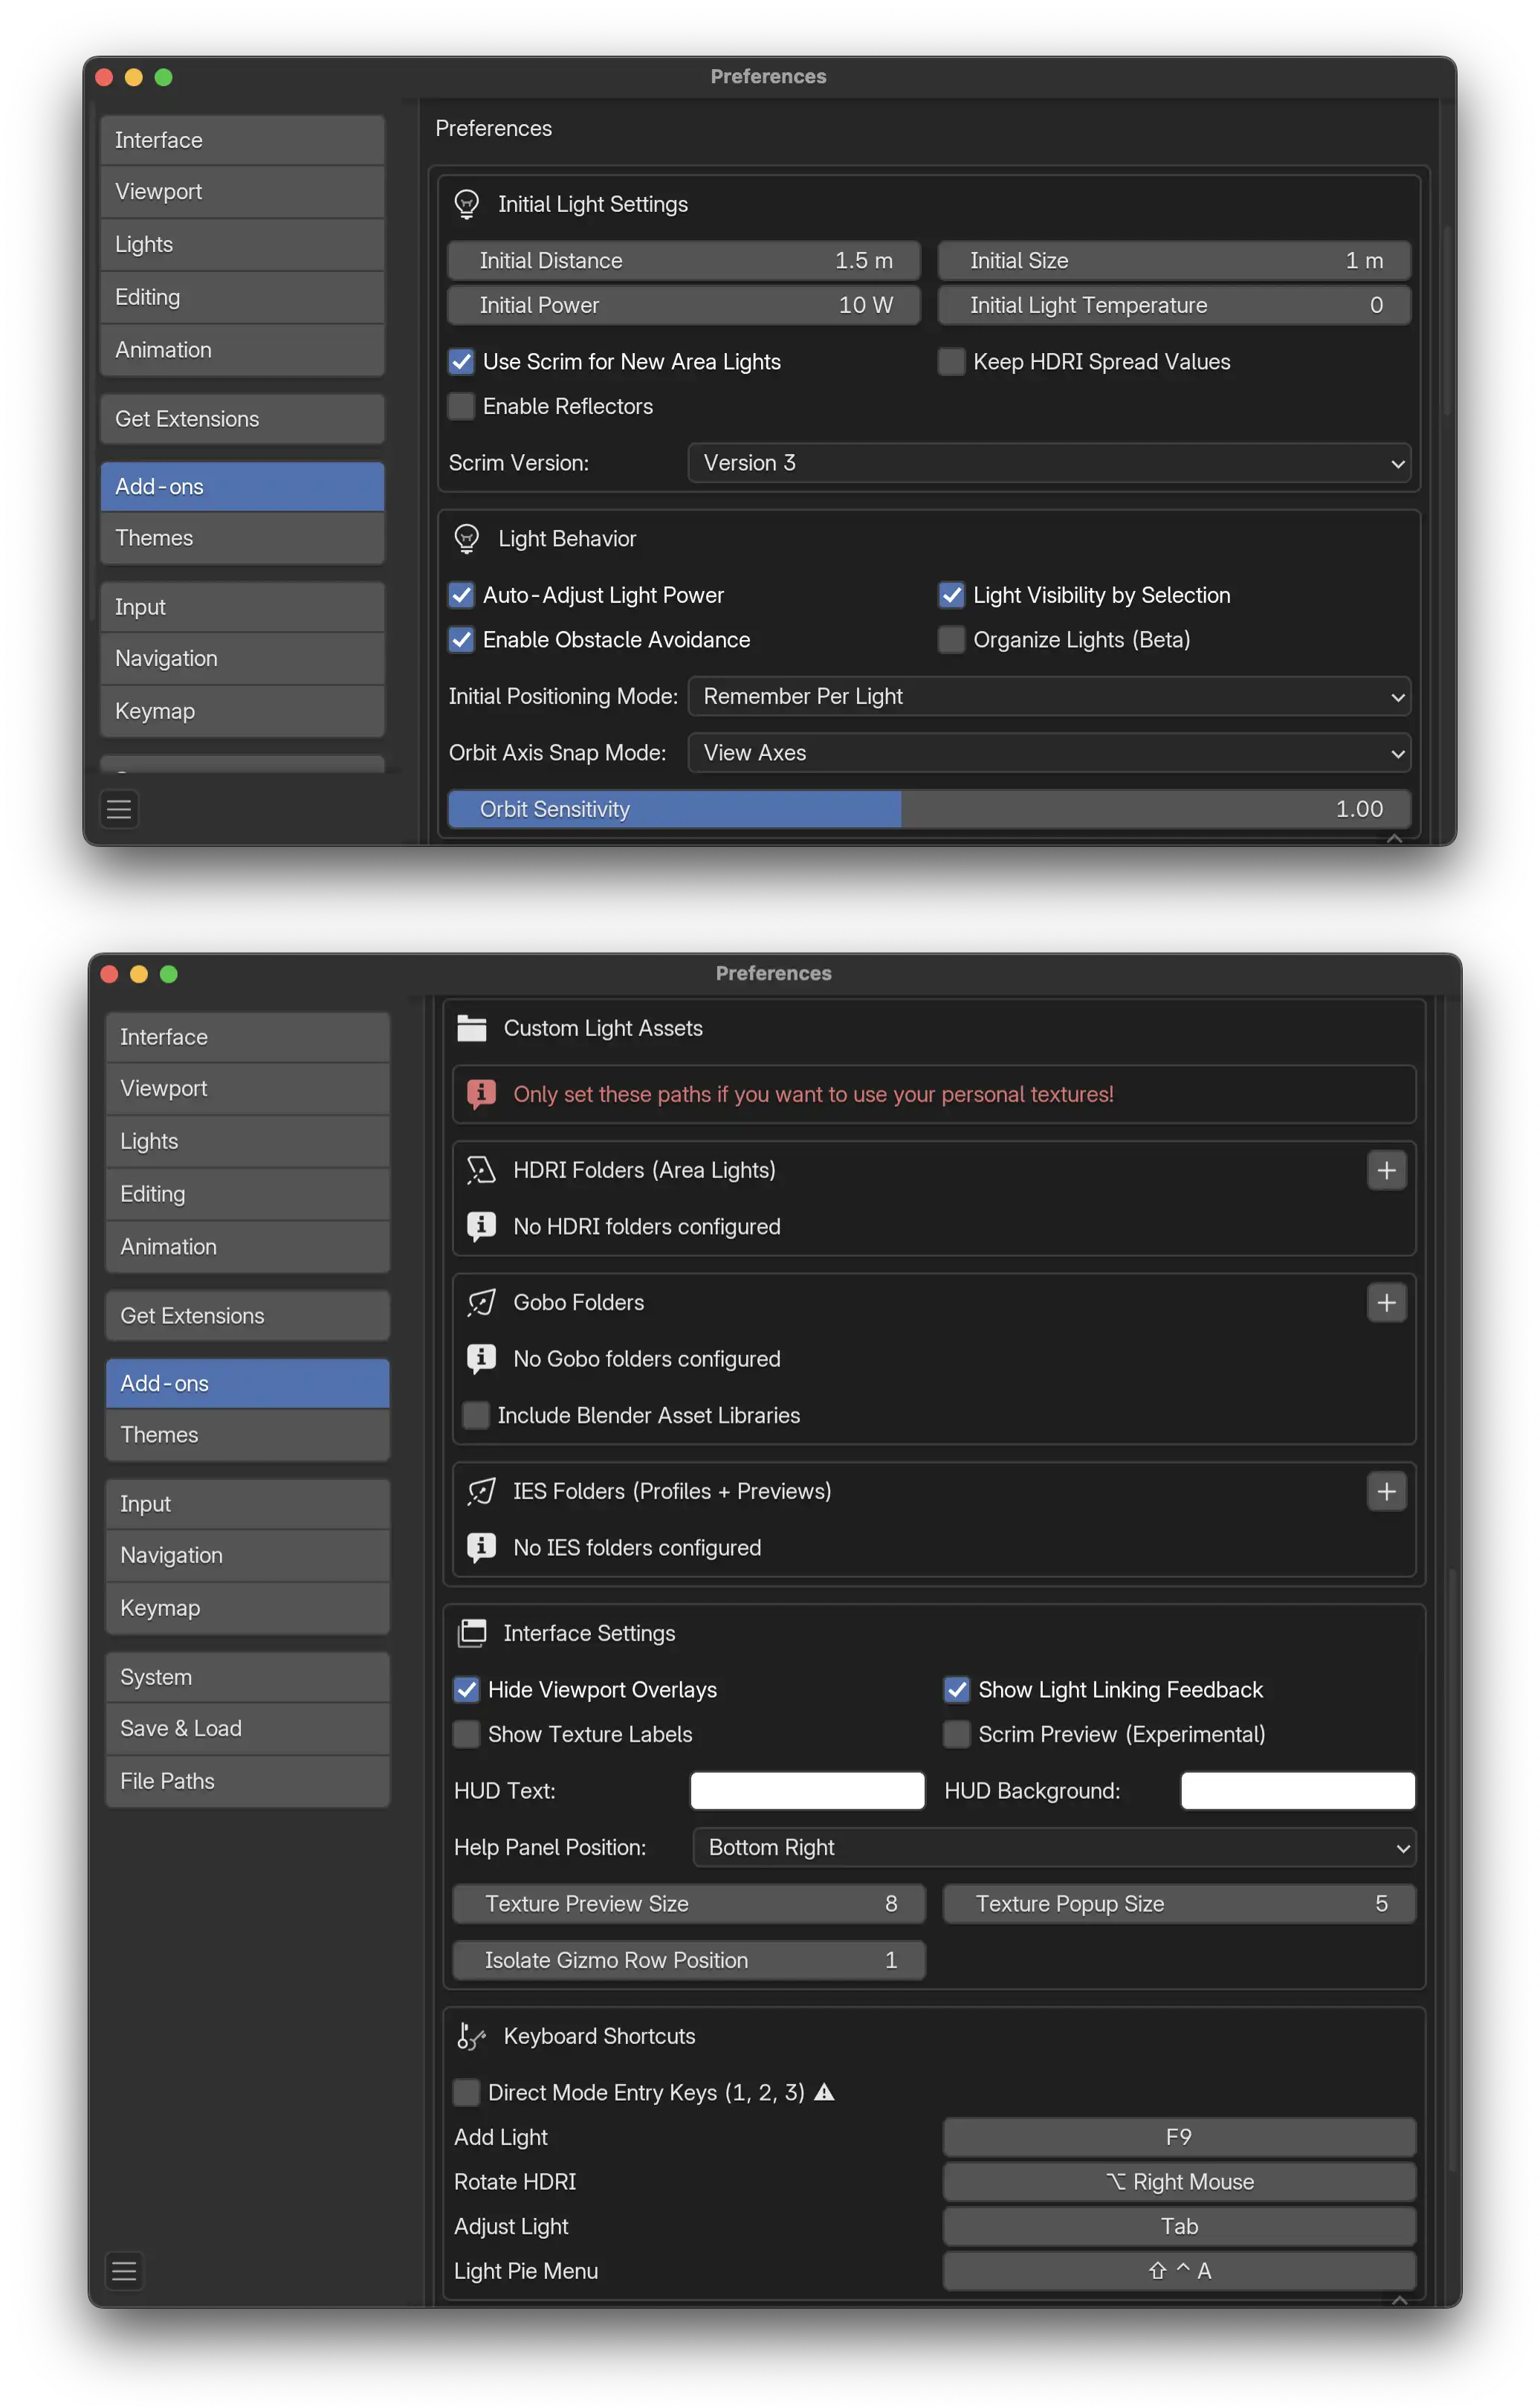
Initial Light Settings
- Initial Distance: Default distance from surface for new lights.
- Initial Size: Default size for area lights.
- Initial Power: Default power for new lights (except Sun lights).
- Initial Light Temperature: Set the initial color temperature of the light. Set to 0 to disable and use plain RGB emission.
- Use Scrim for New Area Lights: When enabled, new area lights in Cycles will use Scrim mode by default.
- Enable Reflectors: Show the Add Reflector option in the right-click menu.
- Keep HDRI Spread Values: When enabled, changing HDRIs won't reset your light's spread value.
- Scrim Version (Blender 4.3+): Choose which version of the Scrim Light node group to use:
- Version 1: Fully procedural - lightweight, cloud render compatible
- Version 2: Procedural with additional EXR textures - enhanced quality, uses more memory
- Version 2.1: Enhanced version with improved quality
- Version 3: Latest version - uses native Blender color temperature
Light Behavior
- Auto-Adjust Light Power: Automatically adjusts light power to maintain consistent illumination when changing size, distance, or spread (disabled in Gobo mode).
- Light Visibility by Selection: Light visibility to the camera toggles with selection: visible when selected, not visible when unselected. Only works when real-time compositor is off.
- Enable Obstacle Avoidance: Prevents lights from being placed inside or below obstacles. Disable for interior lighting scenarios where lights need to be placed inside models.
- Organize Lights (Beta): Automatically place new lights into a specific 'Lights' collection and rename them to reflect their light mode.
- Initial Positioning Mode: Controls how lights behave when entering adjustment mode:
- Remember Per Light: Use each light's previous pause/active state
- Always Start Paused: Always begin with positioning paused
- Orbit Axis Snap Mode: Choose whether Ctrl snaps to view axes or world axes in orbit mode.
- Orbit Sensitivity: Adjusts the sensitivity of orbit mode movement.
Custom Light Assets
Configure paths to your personal texture libraries. Only set these if you want to use your own textures.
- HDRI Folders: Add multiple folders containing HDRI textures for area lights. Use the + button to add folders and the refresh button to rescan.
- Gobo Folders: Add multiple folders containing Gobo textures. Use the + button to add folders.
- Include Blender Asset Libraries: Optionally scan Blender's configured Asset Libraries for additional Gobo sources.
- IES Folders: Add paired folders for IES profiles and their preview images. Both paths must be set for each slot.
Interface Settings
- Hide Viewport Overlays: Toggle viewport overlays during light manipulation.
- Show Texture Labels: Display filename labels below texture previews in the Light Customization panel.
- Show Light Linking Feedback: Show visual overlay feedback when adding/removing objects from light linking.
- Scrim Preview (Experimental): Enable real-time scrim light preview rendering in the Light Customization panel.
- HUD Text Color: Customize the color of floating text hints above the cursor during light manipulation.
- HUD Background Color: Customize the background pill color behind floating text hints.
- Help Panel Position: Choose to display the keyboard shortcuts help panel in the bottom-right or bottom-left corner.
- Texture Preview Size: Size of texture thumbnails in the Light Customization panel.
- Texture Popup Size: Size of texture thumbnails in the popup selection window.
- Isolate Gizmo Row Position: Which row the isolate gizmo appears in the viewport.
Keyboard Shortcuts
Customizable shortcuts are displayed in the preferences panel:
- Add Light: Default F9
- Adjust Light: Default Tab
- Rotate HDRI: Default Alt + Right Mouse
- Light Pie Menu: Default Ctrl + Shift + A
- Direct Mode Entry Keys (1, 2, 3): When enabled, skip Tab and jump directly to positioning modes. Warning: This overrides Blender's collection visibility shortcuts.
Usage Guide
Adding a Light
- Right-click and navigate to
Light Operations > Add Light. - Use the F9 hotkey.
- Use the Pie Menu with Ctrl + Shift + A.
Real-Time Adjustments
- Power: Mouse Wheel or two-finger scroll on trackpad.
- Size: Shift + Mouse Wheel or Shift + two-finger scroll.
- Proximity: Alt + Mouse Wheel to adjust distance to surface.
- Spread: Ctrl + Mouse Wheel.
- False Color Mode: Press F to toggle between current view and False Color mode.
- HDRI Rotation: Alt + Right Mouse Drag to rotate world HDRIs and dome objects.
Toggle Light Positioning Modes
When Direct Mode Entry Keys is enabled:
- Press 1 for Reflect mode
- Press 2 for Orbit mode
- Press 3 for Direct mode
Adjust Existing Lights
- Select the light, right-click and choose
Light Operations > Adjust Light. - Use the Tab hotkey.
Track to Target
- Right-click
Light Operationsand select "Track to Target". - Choose to create a new empty for tracking or use an existing object.
- If multiple lights are selected, all will target the chosen point.
Light Visibility Controls
- Hide Current Light: Press H to toggle hiding the current light.
- Isolate Current Light: Press I to toggle isolating the current light.
Light Linking Control
- Press L to add the object under the mouse to the current light's linking collection.
- Press L again to exclude it.
- Press L a third time to remove it entirely.
- Use Shift + L to manage shadow linking with the same sequence.
Precise Mode
Press Space to toggle Precise mode (disables normal averaging for exact placement).
Light Customization
Cycles Renderer Exclusive
Located in the Light Data panel, the Light Customization section offers unique options for each light type:
- Area Light: Choose from Default, Scrim, HDRI, or Gobo modes.
- Spot Light: Choose from Default or Gobo modes.
- Point Light: Choose from Default or IES profile modes.
Special Customizations
- Procedural Scrim: Transform an area light into a light scrim effect with adjustable feathering and gradient.
- HDRI Textures: Apply HDRI textures like Octabox, Parabolic Reflector, Umbrella, Fresnel, LED panel, and more.
- Gobos: Use gobos for dynamic shadows in your scene, with some options featuring animation.
- IES Profiles for Point Lights: Accurately replicate real-world lighting patterns with IES light profiles.
- Interactive Scrim Preview: Real-time preview rendering in the customization panel (experimental feature, enable in preferences).
- Custom Textures: Add your own HDRI, Gobo, and IES folders in addon preferences.
HDRI Scene Rendering
Located in the World tab, this feature allows you to render a 360° HDRI image of the current scene with a single click.